In recent years, Facebook has come under fire for allowing fake accounts and pages to spread false information around the site. This information could be easily manipulated through the editing of links as Facebook users could change the preview image, heading and text of links they posted, spreading inaccurate information around the platform.
In 2017, Facebook updated their policy to target this issue, and implemented ‘Domain Verification’ for Facebook pages. This policy requires Facebook page owners to take action if they would like to continue editing links from their own website. Luckily, there are a few simple steps to verify that a domain is yours. Here’s our guide to verifying your domain on Facebook.
What is Facebook Domain Verification?
Facebook’s Domain Verification requires businesses and individuals to verify that their website is owned by a particular page so that the page managers have permission to edit links. By either placing a meta-tag in your website’s HTML, Facebook’s TXT record in your domain DNS records, or uploading the HTML file that Facebook provides, you can prove that you own a website and connect it to your Facebook page. However, Facebook users do not have to verify a domain if they aren’t bothered about editing link previews, so you don’t have to worry if this doesn’t apply to you!
Who Should Verify their Domain?
If you are a Facebook page owner that would like to edit link previews from your website when posting, you will need to prove that you own your website. If you are happy to have links on your posts without editing them, then you don’t need to worry about meta-tags, DNS verification or HTML file upload!
How Do I Verify my Domain?
There are three different ways that you can verify your domain on the Facebook business manager. Facebook will provide you with a meta-tag to place on your website, an HTML file to upload to the root directory or a .txt file to upload to DNS records for your domain. However, before you do this you will need to enter your domain into your Facebook page.
Add Your Domain to Facebook Business Manager
The first step for domain verification is to head to the Facebook Business Manager for your page. Here, you can find the business settings. Click on your business settings, and then ‘Brand Safety’ in the left-hand menu. Under ‘Brand Safety’ there will be a link to ‘Domains’. Click this button and follow the instructions via the Facebook pop-up. Once you have entered your domain, you will find that Facebook gives you a new page where you can ‘select one option’ for domain verification.
Adding a Meta-tag to your HTML Source Code
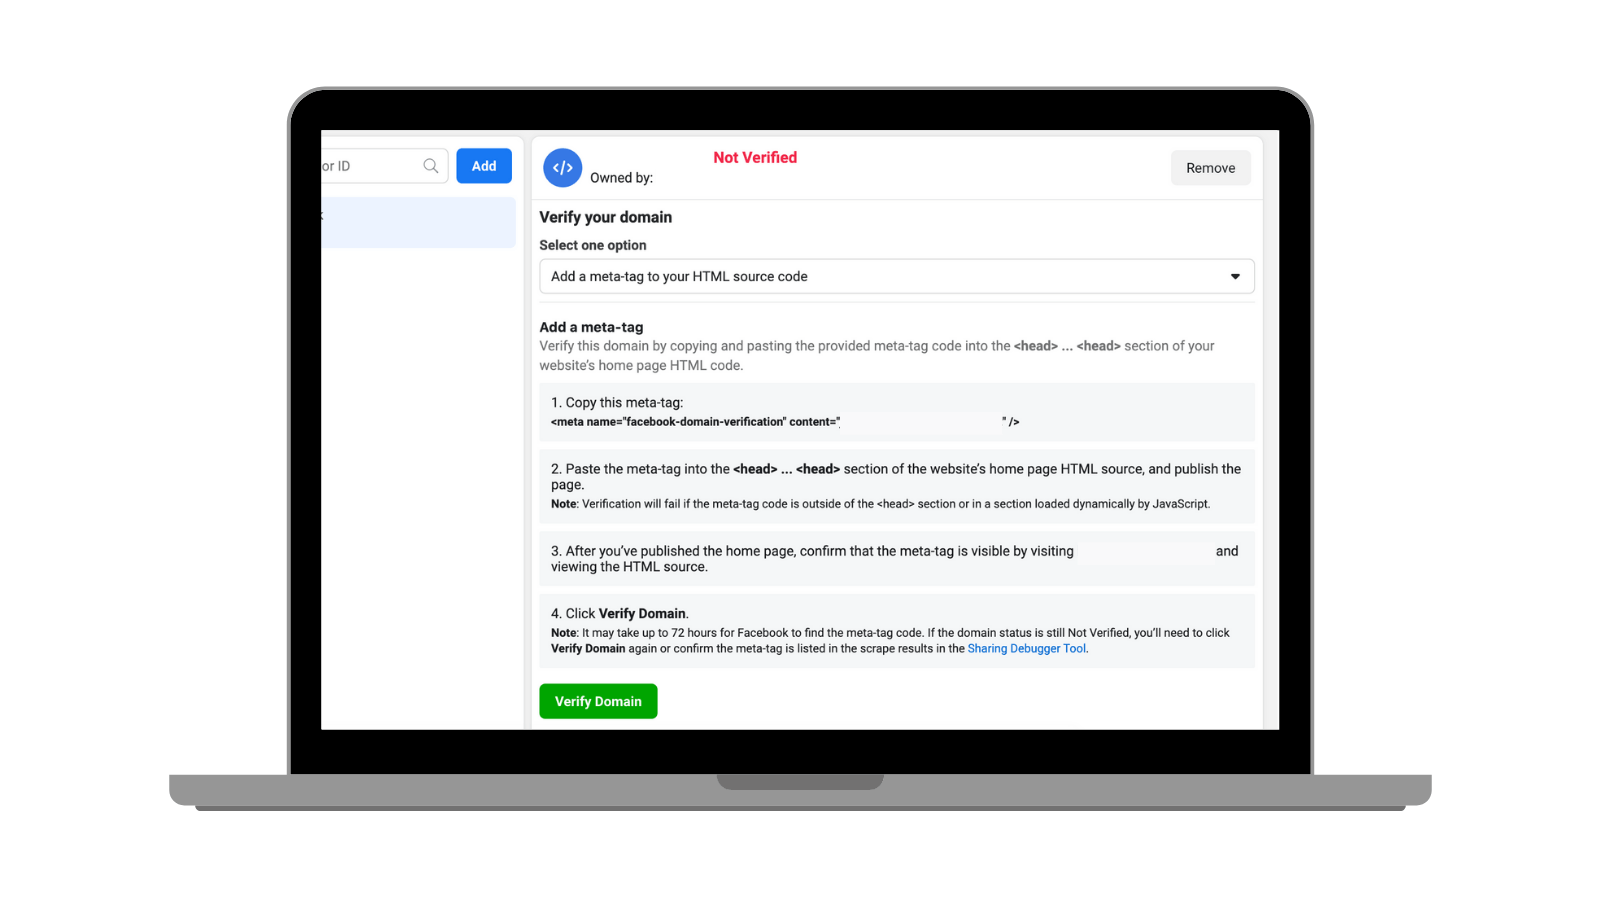
The first way you can verify your domain is by adding a meta-tag to the HTML source code on your website.
- Copy the meta-tag that the Facebook Business Manager provides you
- Paste the meta-tag into the <head> … <head> section of your website’s home page HTML and click to publish
- To make sure the meta-tag has been successfully placed in the HTML for your site, you can head to your website and click to view HTML source (by right-clicking). Find the meta-tag within the code to confirm it has published correctly
- Head back to the Business Manager ‘Domains’ page and click the green ‘Verify Domain’ button
- It can sometimes take up to 72 hours for domain verification to take place, so if it doesn’t work straight away, try it again the next day
If you’re unsure as to where to find the HTML for your website’s home page, contact your website hosting so that they can help you.

Upload a HTML File to Your Root Directory
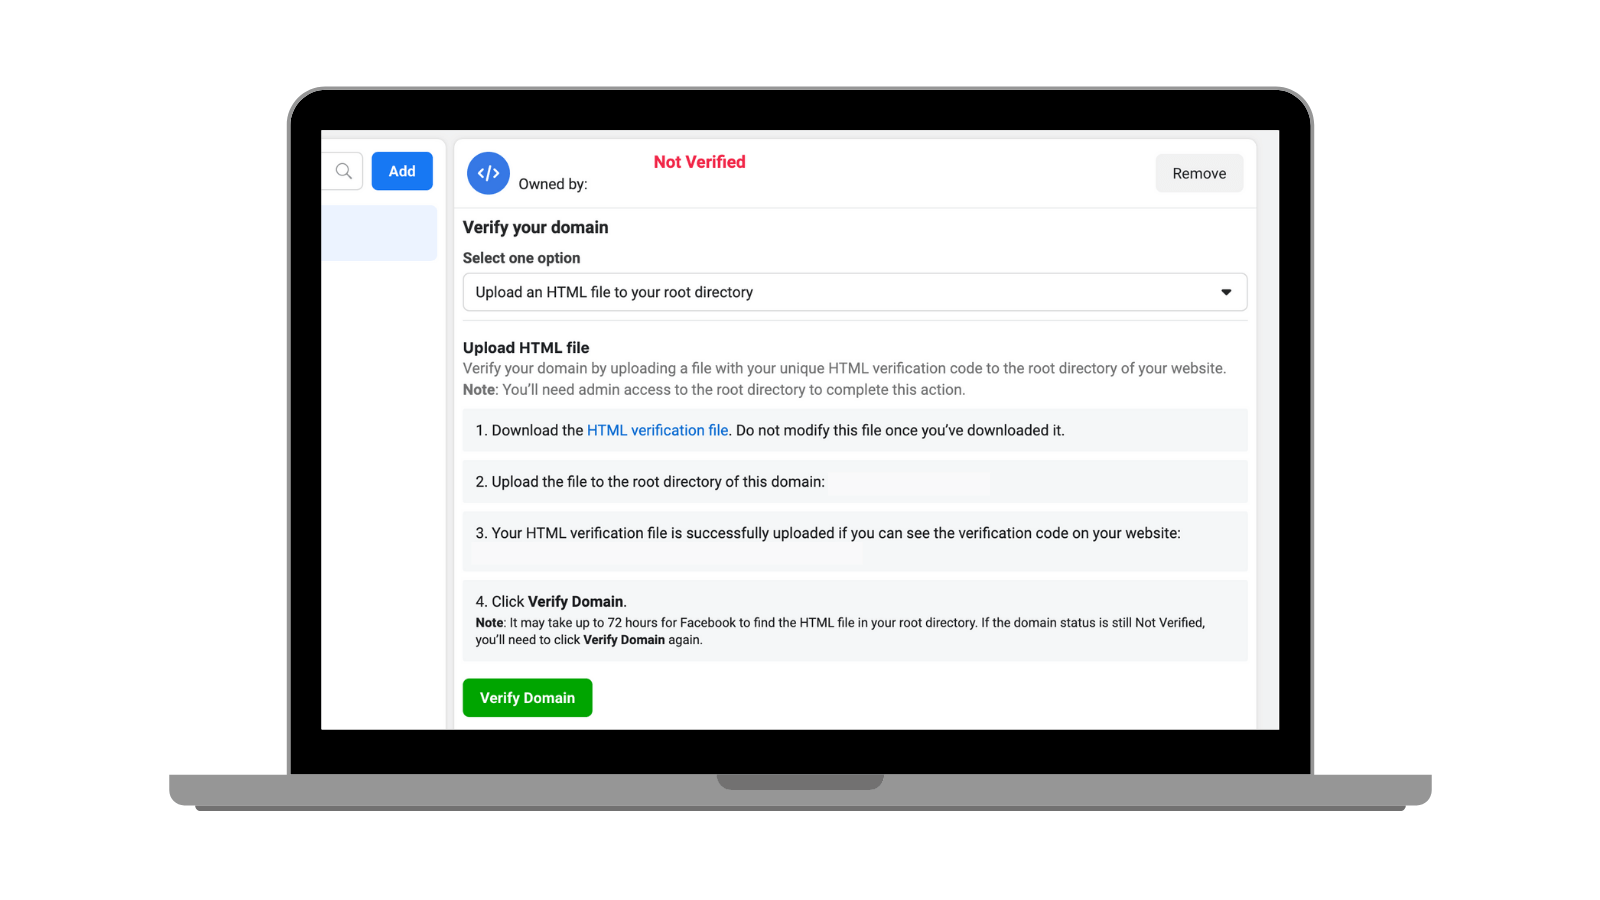
Another way to prove ownership of your domain for your Facebook business page is through a HTML file upload. To do this, follow these steps:
- Download the HTML Verification File provided via a link on the Business Manager ‘Domains’ page
- Once you have downloaded the file, upload it to the root directory for your domain
- Click the verify button on Facebook – it can take up to 72 hours to confirm your ownership of a website, so don’t panic if it doesn’t work straight away

Update the DNS TXT Record with Your Domain Registrar
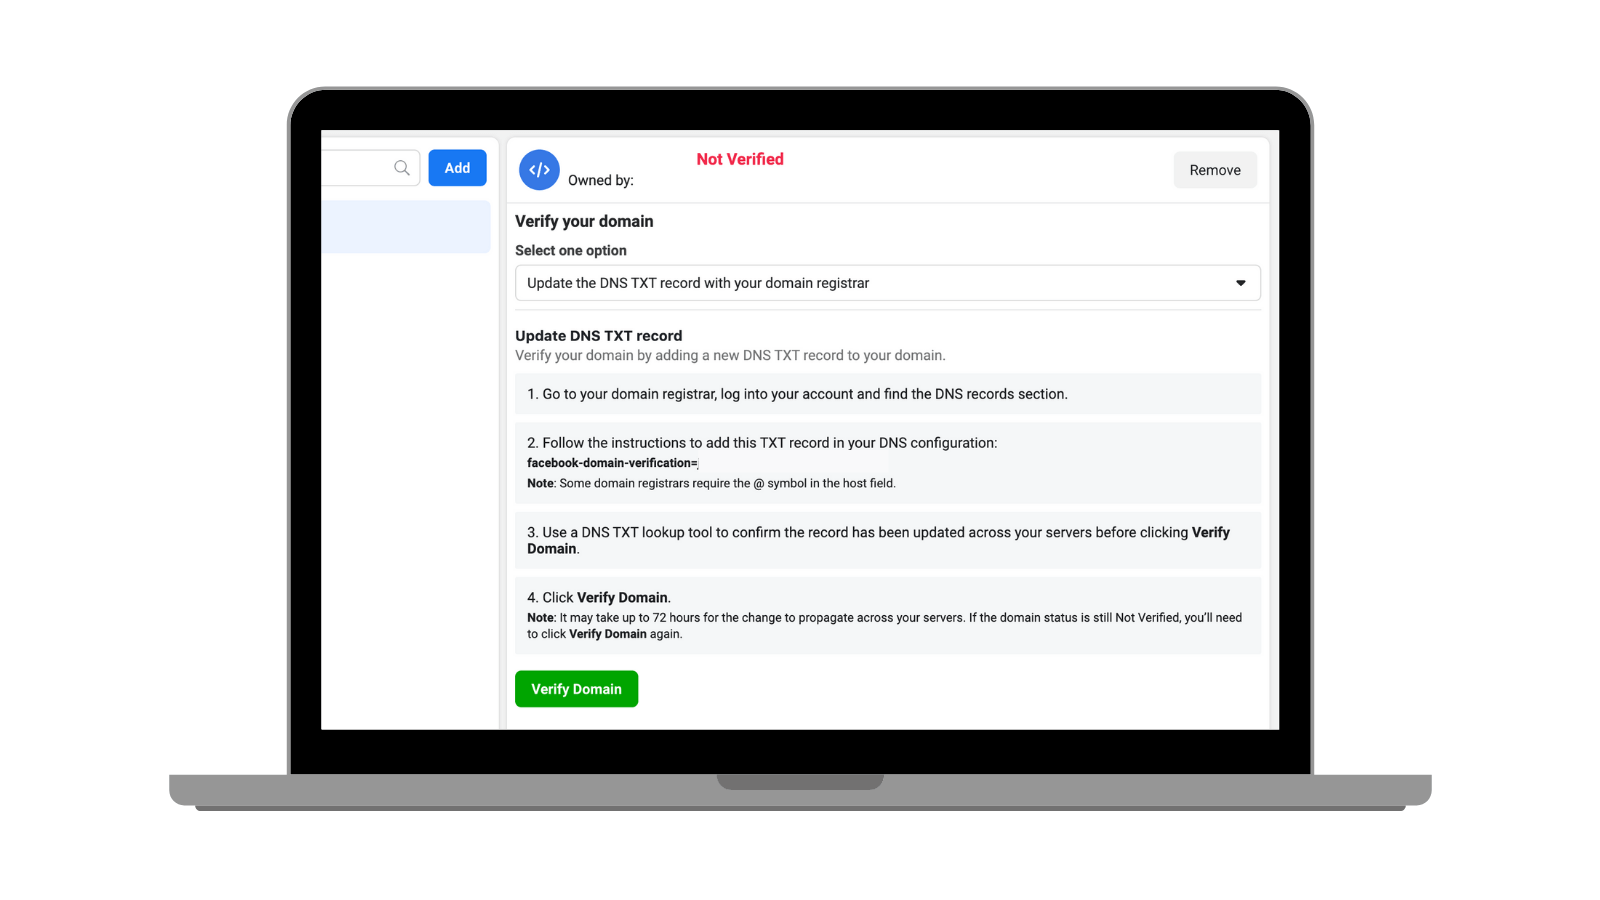
The third and final option that Facebook gives you for domain verification is to update your domain with a new DNS record. For DNS verification, go to the website that you have purchased your domain on and follow the steps below.
- Log into your domain host and find the DNS records
- Copy the TXT DNS record provided on the ‘Domains’ Facebook page
- Create a new .txt DNS record for your domain
- Click the green verify button on the business manager account
Some users prefer DNS record verification because it means they do not have to edit or play around with their website’s HTML.
If you struggle with any of these steps, contact your domain or website provider for support.

Final Step: Connect Your Facebook Page to Your
Verified Domain
Once you have verified your domain via the Facebook Business Manager, you will need to connect your specific page to the domain. To do this, click the ‘Add Assets’ button on the domain business manager page. A pop-up will instruct you to select your business page, and click ‘Add’ to connect it with the domain you have just verified. Once you have followed these steps, you have successfully implemented domain verification so that you can edit link previews to articles, news posts and anything else from your website.
Reach Marketing Goals on Facebook with The Social Network
Jacinta at The Social Network is a social media consultant, strategist and trainer. Jacinta is also a Small Business Trainer for Facebook with #SheMeansBusiness. Having worked with a number of clients to meet and exceed marketing goals, Jacinta can help you to increase business ROI and brand awareness online. Whether you just don’t have time or are unsure as to how to effectively use Facebook for marketing, The Social Network can help! Get in touch with us today to chat by emailing hello@thesocialnetwork.ie or calling +353 85 2179118.
Help Your Business with a Trading Online Voucher
Let's look at Ireland's Trading Online Voucher (TOV) Scheme, a fantastic program designed to help...
Should I Have A Social Media Content Calendar?
Are you tired of the last-minute panic of figuring out what to post on your multiple social media...


